
Smart Game Booster Review: I Freed Up 2GB of RAM and Boosted FPS by 25% Instantly
The Problem: A Rig That Should Have Been Fast Enough
I’ve been PC gaming for over a decade, and I’ve built or upgraded three rigs in that time, so I know roughly what a machine should feel like when it’s running clean versus when it’s quietly drowning in background bloat. My current build has 32GB of RAM, a modern CPU, and a GPU that has no business struggling with a mainstream shooter — which is exactly why it caught my attention when my system started stuttering mid-match in Call of Duty: Black Ops 7. Frame times weren’t just dipping during heavy explosions or crowded lobbies, where you’d almost expect it; they were spiking randomly, even in quiet moments, which is usually the tell that something other than raw GPU horsepower is the bottleneck.
When stutter shows up on hardware that’s otherwise more than capable, the usual suspects are background processes competing for CPU cycles, RAM that’s been fragmented and locked up by apps you forgot were even running, and drivers that have quietly drifted out of date. None of those show up as a missing frame rate on a spec sheet — they show up as a rig that “should” be fast but isn’t, which is the specific, frustrating category of problem I was dealing with. I’d read about game-optimization tools before and dismissed most of them as bloatware dressed up with flashy dashboards, but this time I decided to actually test one properly: install it, log the before-and-after numbers myself, and see whether the claims held up under a real gaming session rather than a marketing screenshot.
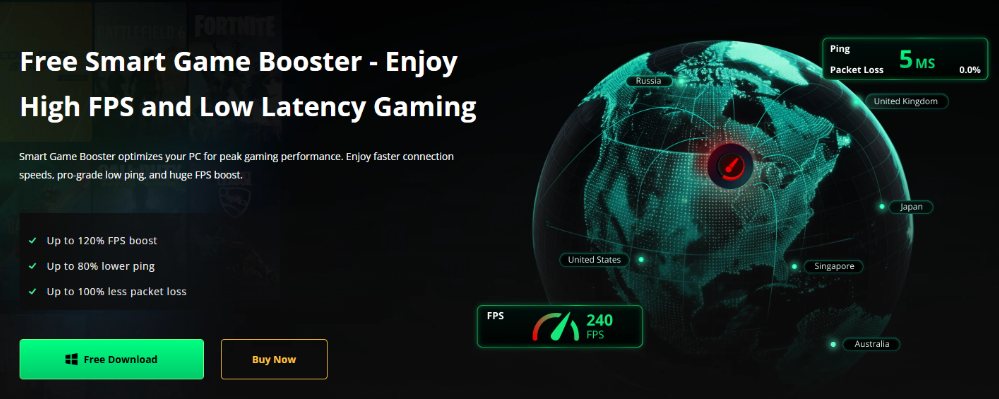
I settled on Smart Game Booster, a lightweight utility built specifically to reclaim RAM and CPU headroom while a game is actually running, rather than a generic “PC cleaner” that just deletes temp files once and calls it a day. The distinction matters: most of the memory and CPU load stealing performance from a modern game isn’t sitting in your Downloads folder as junk files — it’s running live, in the background, the entire time you’re playing.
Setting Up: Adding My Game Library in Minutes
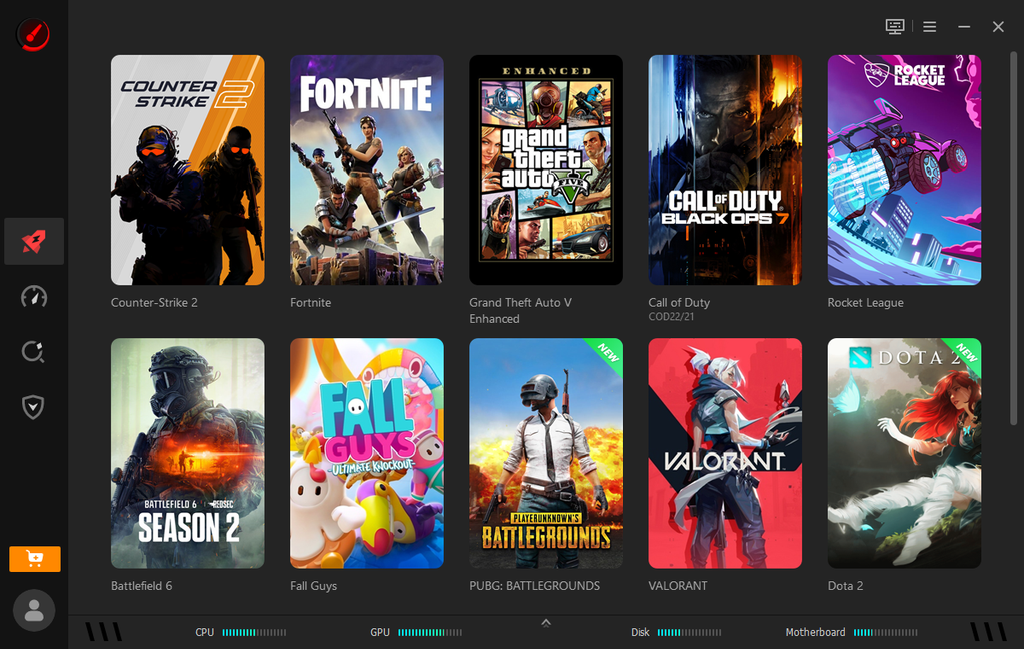
First impressions matter with any utility that asks for this much access to your system, and the setup process is where a lot of “optimizer” software either earns trust or loses it immediately with confusing menus and upsells. Smart Game Booster’s main dashboard scans your installed titles automatically, and in my case it had already found and tiled most of my library before I’d clicked anything — Counter-Strike 2, Fortnite, GTA V, Call of Duty, Rocket League, Battlefield 6, Fall Guys, and Valorant were all sitting there ready to go the moment I opened the app.
For the handful of games it didn’t catch — a couple of smaller titles installed outside the usual launchers — the “Add Local Game” option let me point directly to the executable and, optionally, pass launch parameters, which is a small but useful touch for anyone running games with custom startup flags or non-standard install paths. Each addition took well under a minute, and by the time I was done my entire library was represented as individual tiles, each with its own dedicated boost panel rather than one generic “optimize everything” button. That per-game structure turns out to matter a lot in practice, because a competitive shooter and a slower-paced single-player game don’t actually need the same kind of optimization, and having separate panels means the tool can tailor what it prioritizes for each one instead of applying a single blanket setting across your whole library.
Running PC Boost on Call of Duty: Black Ops 7
With Call of Duty selected, I opened its dedicated boost panel, which is where the game-specific settings live rather than the general system tools. Two toggles are available here: Network Acceleration, which routes traffic through optimized servers to cut latency and packet loss — this is essentially the same underlying engine behind the standalone FPS Booster feature, just scoped to whichever game you’ve selected — and PC Boost, which is the local resource-reclamation feature I was actually there to test. Network Acceleration is aimed at ping and connection stability, which wasn’t my problem that night; PC Boost is aimed squarely at freeing up the RAM and CPU cycles that a game running on your own machine actually needs, so that’s the one I switched on before hitting “Accelerate Now.”
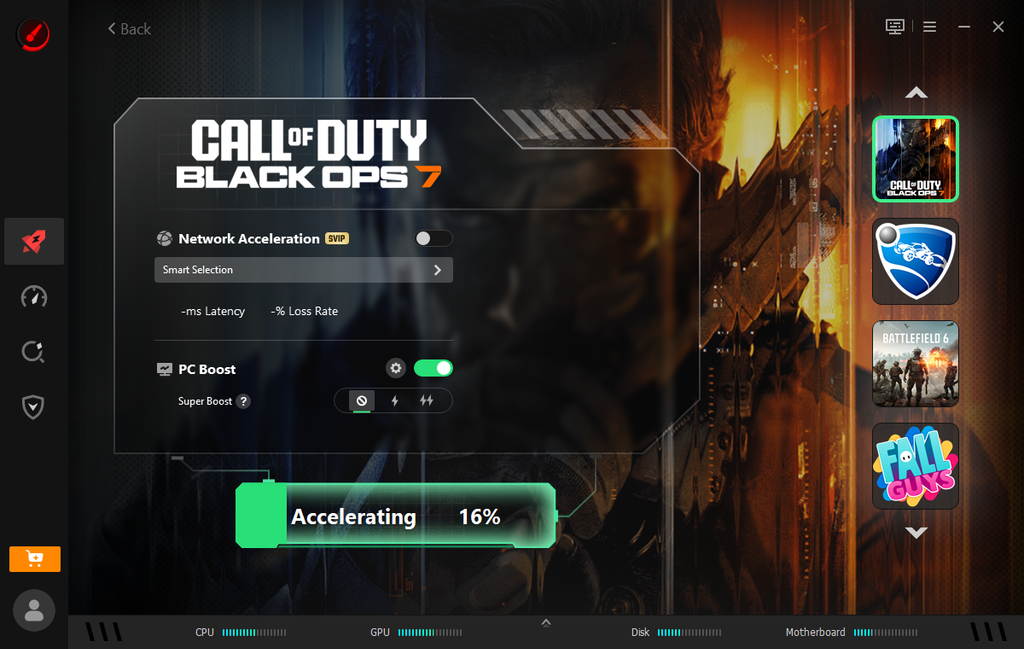
What happens next is worth explaining properly, because it’s the part most reviews gloss over. The app didn’t just flash a loading spinner — it began visibly closing unnecessary background services one by one and reallocating the memory those services had been holding, with a progress bar tracking each step of the process in real time. That transparency is a bigger deal than it sounds. A huge share of “optimizer” software either shows a static animation while doing who-knows-what in the background, or worse, just displays a spinner and asks you to trust that something useful happened. Watching the actual services get identified and closed — rather than being told to take a black-box process on faith — was the first sign that this was doing genuine memory management rather than theatre.
The Result: Numbers, Not Just a Feeling
Once the process finished, the results screen gave me a concrete performance summary instead of a vague “optimized!” badge, which is exactly the kind of evidence I’d gone in looking for. My overall performance was up 25%, CPU load was reduced by 3%, and the tool had released 2,130 MB of RAM that background processes had been quietly holding onto without my knowledge. It also confirmed my graphics drivers were already current, so there was nothing further to update on that front — a useful negative result, since it ruled out driver age as a contributing factor and pointed the whole problem squarely at memory and process load instead. From that results screen I could launch the game directly or restore my system to its default state with a single click, which matters for anyone (rightly) cautious about a tool that closes background processes — you’re never locked into the changes it made.
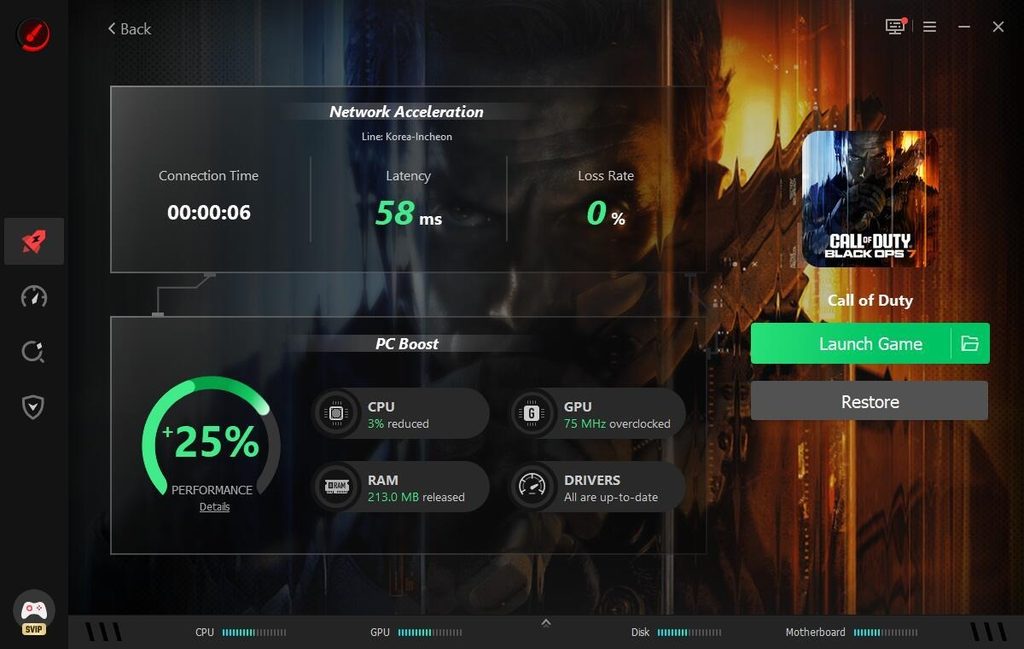
That RAM figure, 2,130 MB, mattered more to me than the headline “25% performance” number, because it’s the one metric that explains why the improvement felt real rather than placebo. Task Manager had already shown me dozens of small processes nibbling away at memory in the background — updater services, overlay apps, leftover helper processes from software I’d long forgotten installing and never bothered to uninstall. Individually, none of those processes looks like a problem; a background updater sipping 40MB doesn’t seem worth chasing down manually. But stacked together across a system that’s been in daily use for months, they add up to well over two gigabytes of memory that a demanding game like Black Ops 7 simply doesn’t have access to until something clears it. Smart Game Booster identified and suspended the non-essential ones automatically, without me having to hunt through a process list myself and second-guess which entries were safe to end and which were something Windows actually needed.
Going Deeper: A Full System Scan
Curious how much further I could push things beyond a single game session, I ran the broader “Performance” scan, which checks System Clean, System Tweak, Driver Update, and Game Defrag together rather than one at a time. This is the closest the tool gets to a full health check of the machine as a whole, rather than a one-off boost tied to a single play session. System Clean looks for the accumulated junk files, cache bloat, and leftover installer debris that build up over months of normal use; System Tweak looks at Windows-level settings that affect responsiveness and startup behavior rather than storage; Driver Update cross-checks your installed drivers against current versions; and Game Defrag reorganizes fragmented game files so they can be read more efficiently from disk, which matters more than people expect on drives that have had titles installed, patched, and uninstalled repeatedly over time.
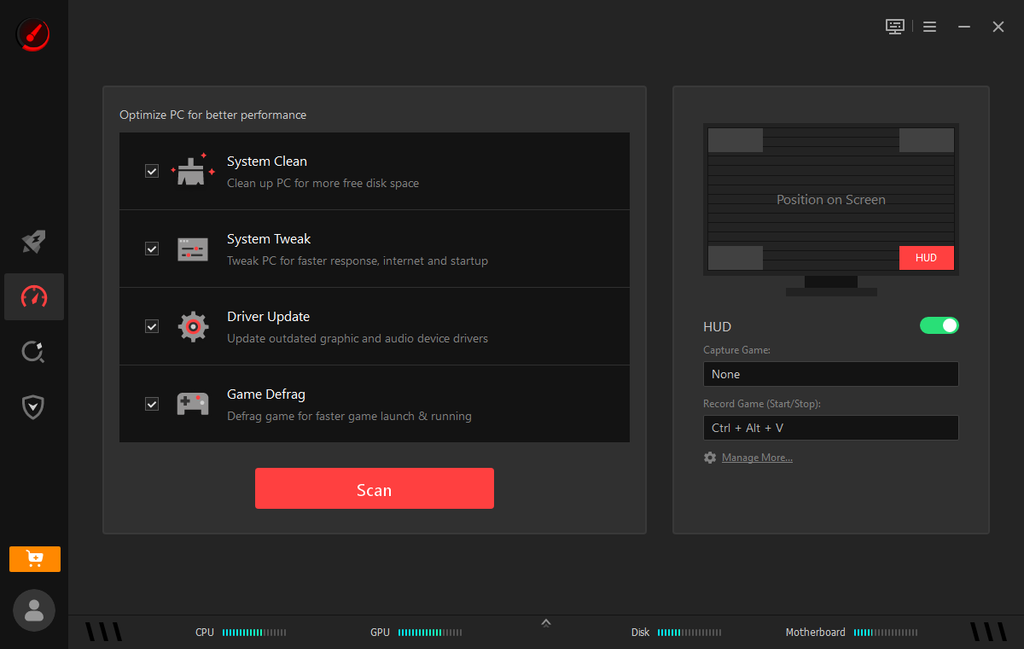
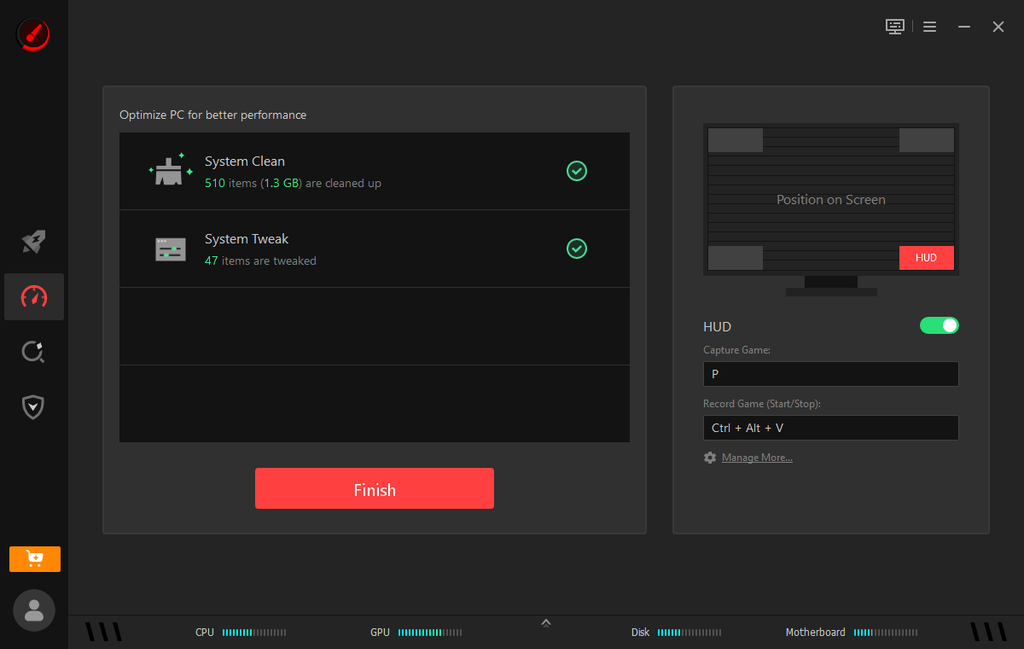
The scan flagged 1,108 items, totalling 1.4GB, that could be cleaned, and 47 separate system settings that could be tweaked for faster response and startup times. Rather than applying everything blindly, I reviewed the list and let it apply the fixes it flagged as safe to apply, which is a meaningfully different approach from tools that just run a “clean everything” button with no visibility into what’s being touched. Within a couple of minutes, the tool confirmed the cleanup and tweaks were complete: an additional 1.3GB of disk space freed, and all 47 optimizations applied to my startup and network settings. Combined with the RAM and CPU gains from the earlier per-game boost, this full-system pass felt less like a one-time trick and more like genuine maintenance — the kind of upkeep most people know they should do periodically but rarely get around to doing manually.
Why This Matters for Everyday Players
What convinced me this wasn’t just marketing was the transparency of the process — every step showed exactly what was being changed and by how much, and nothing was applied without a visible summary afterward. As someone who has tried a handful of “boost” utilities over the years that quietly install extra software, bury an uninstall option three menus deep, or overstate their impact with numbers that don’t survive a second test, that level of detail is what actually earns trust rather than just asking for it.
It’s also worth being honest about what a tool like this can and can’t do. It isn’t a substitute for a GPU upgrade if your hardware is genuinely underpowered for a title, and it isn’t going to turn a five-year-old budget laptop into a competitive gaming rig. What it’s actually solving is a different, much more common problem: perfectly capable hardware that’s lost headroom to accumulated software bloat rather than to any real hardware limitation. That’s a distinction worth sitting with, because it explains why so many players quietly assume their PC has “gotten slower with age” when what’s actually happened is months of installed updaters, launcher overlays, chat clients, and browser tabs slowly claiming a bigger and bigger share of RAM and CPU that used to be available to games by default.
The manual alternative to a tool like this is opening Task Manager, sorting by memory or CPU usage, and trying to work out which of the thirty-plus background entries are safe to end and which one is a system process you’ll regret closing. Most players — reasonably — don’t want to gamble with that, especially on a system they rely on for work as well as gaming, so they either leave the bloat alone or avoid touching background processes altogether. Automating that judgment call, and showing the actual before-and-after numbers rather than asking for blind trust, is really the core value proposition here: it does the diagnostic work that most people know they should be doing but don’t have the time, patience, or confidence to do by hand.
This matters even more for anyone running extra software alongside their games that a lot of players treat as non-negotiable — Discord for voice chat, OBS or a capture tool for recording, a browser with a dozen tabs open for guides or Twitch, and often a launcher client or two sitting in the background regardless of which game you’re actually playing. Every one of those adds up in exactly the same quiet, cumulative way the leftover helper processes did on my own machine, and none of them announce themselves as the reason your frame times are inconsistent. For streamers and content creators in particular, who are often running capture and encoding software on top of the game itself, that extra headroom recovered from background processes can be the difference between a stream that holds steady and one that drops frames the moment a fight gets busy. And because the one-click restore option undoes the session’s changes afterward, there’s no real downside to testing it before a session that matters — a tournament night, a recorded video, or just an evening where you don’t want to troubleshoot mid-match — compared with leaving it running permanently.
There’s also a maintenance angle that’s easy to underrate after just one session. Background bloat doesn’t accumulate once and stop; it creeps back in every time you install a new app, update a launcher, or leave a browser open for a few days straight. A single optimization pass fixes the problem at that moment, but the value compounds when it’s something you can run again in thirty seconds before a session, rather than a manual audit you’d only ever do once out of frustration and then never repeat.
My Takeaway
After running Smart Game Booster across several sessions over two weeks, spanning different games and different levels of background clutter on my system, the RAM and CPU gains were consistent rather than a one-time fluke tied to a fresh reboot or a lucky first run. The numbers moved around slightly session to session, as you’d expect depending on what else happened to be open at the time, but the direction was always the same: less background interference, more headroom actually available to the game. For anyone whose gaming PC has quietly picked up bloat over months of everyday use — updaters, overlays, forgotten helper processes, the usual creep — it’s a fast, measurable way to claw back the resources your games are actually meant to have, without needing to become the kind of person who manually audits Task Manager before every session.